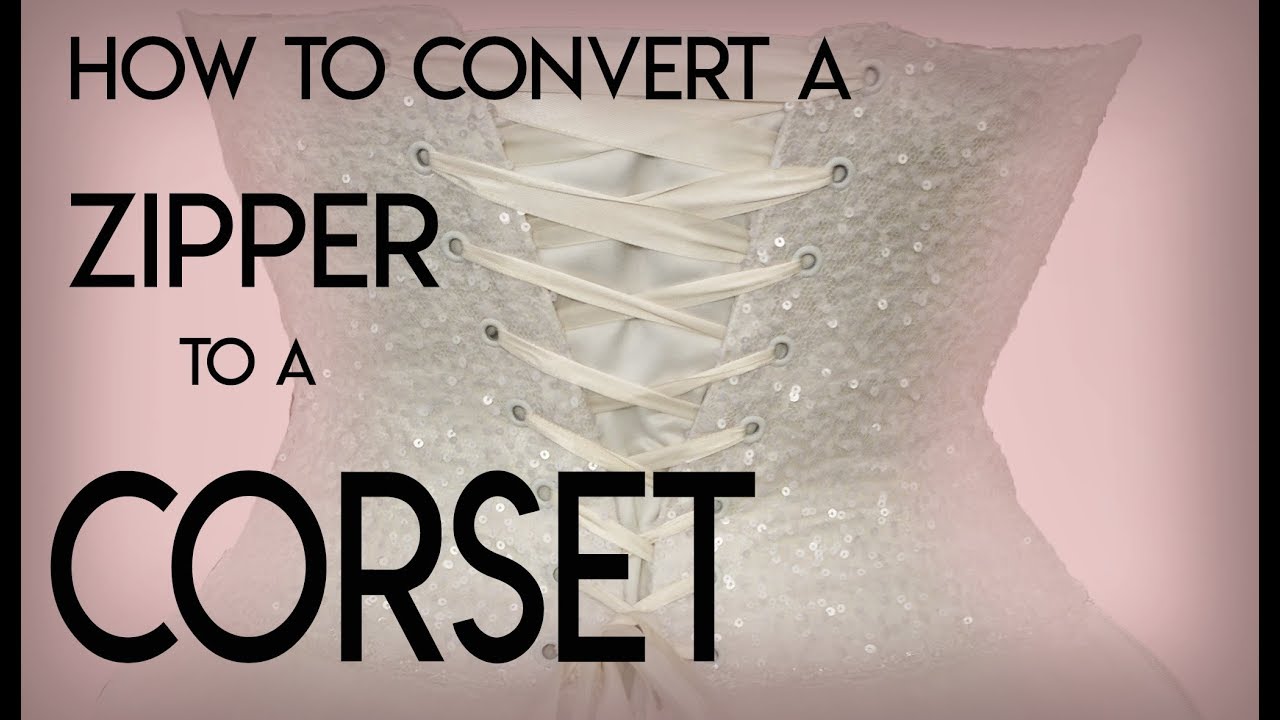
If you have envisioned the ideal wedding gown and secured it long before your special day, only to find it a tad tight due to some unexpected weight gain just before your ceremony, fret not. There's a way out of this. Think about incorporating a corset back into your dress. We've put together an extensive, detailed guide on adding a corset back to a wedding dress, which you can find below.
The wedding dress is something with which you never want to compromise. Just like any other bride, you will want to look the best on such a precious day of your life. However, it will become your worst nightmare if you find the wedding dress unfit just before the wedding day. We will recommend not to freak out in such a situation and consider adding a corset back.
Don’t know how to add the corset back in the wedding dress? Don’t worry, we will let you know the exact steps you will require following to do this. What you need to do is to go through the entire article with proper concentration to make your wedding dress perfectly fit and beautiful.
How to Add a Corset Back to a Wedding Dress
If your wedding dress is unfit, adding the corset dress can be the most pocket-friendly way to fit it. Especially, if you have some prior sewing experience, you should be able to easily add the corset back without any help from the seamstress. However, if you are not confident about doing this single-handedly, we will recommend not to try as you might end up spoiling the dress.
Usually, the seamstress also uses the corset back to fit a wedding dress that doesn’t fit perfectly. That is mainly because it works great in the place of the zipper and also looks good on most of the body shapes. Now let’s see the exact thing that you need to do to add a corset back to the wedding dress. Before you begin make sure that you have all the sewing supplies for this.
Here are the steps you need to follow:
Steps 1
The first thing you need to do is to remove the included zipper using a seam ripper. Make use of the tool in the correct manner to open up the seams where the zipper is fixed with the dress. Make sure to begin from the top of the dress and go down below. Sometimes you might want the corset to be a bit longer than the zipper. In such a case, make space for this.
Some wedding dresses might include stitches instead of the zipper liner. In such a case, you will require cutting the stitches one by one carefully. Note that you shouldn’t entirely remove the entire zipper from the dress. You can leave it with few centimeters to ease with wearing/removing it.
Step 2
The next thing you need to do is to tug down the zipper and secure it with something like a safety pin. This will prevent the zipper from coming out from the tape while cutting. Now you need to do is to cut some of the excess zipper tapes from both sides. Now you need to cut the lining of the dress’s outer fabric and then tuck one inch of the zipper into the dress. This should be in the middle of the outer fabric and the lining.
Step 3
The next thing we need to do is to make the lacing loops that you will use later on the back of the dress. Make sure to pick the right color and variation of the fabric that will match the wedding dress. They also need to be made of the same materials. Now find the strap material and make it a one-inch strip by cutting. The next thing you need to do is to fold the thing in half lengthwise and then flat it through ironing.
Step 4
Make sure to prepare the strip in the same length as the corset back you want. Along with that, it should be around 6 inches more than the corset so that you can make additional loops if you want. The next thing you need to do is to sew the strip you have just made and flatten it. You will require using the same variation of thread color for the best outcome. After doing this, get rid of the raw edges from the open side.
Step 5
The next thing you need to do is to turn the lace upside down. To do this, enter a small safety pin through the lace and tuck by tucking one end and then pulling it out through the other end. Once you are done doing this, you will require removing the safety pin.
The next thing you need to cut the lacing into smaller pieces around one and a half inches. That is a little longer than what we need to make things easier while sewing with the dress.
Step 6
Now starting from the left side of the zipper opening, you will require forming the loops. Use the pin to make the loop by securing both sides of the segments. Cover the entire area of the opening. Then do the same for the right zipper opening of the dress. Secure them in the place with a pin. Then sew them and remove the pin one by one while sewing.
Step 7
Now you can lace the dress with a proper ribbon which you might purchase or make on your own. Make sure the ribbon you are picking arrives in the same color and texture. The next thing you need to do is to prepare the modesty panel as you prepare and then secure it with the dress. That’s it, you are done.
Conclusion
If you have prior sewing experience, you should be able to implement the above steps and add the corset back to the wedding dress. However, if you have no prior experience with this, you shouldn’t even dare to try as there are chances of ruining the dress. You better do this from a seamstress.